Standing seam metal roofing is a durable, weather-tight system with sleek, modern aesthetics, ideal for residential and commercial projects. It offers low maintenance and a long lifespan, making it a popular choice for builders and homeowners seeking a reliable roofing solution.
1.1 Benefits of Standing Seam Metal Roofing
Standing seam metal roofing offers exceptional durability, weather-tightness, and a long lifespan, making it a superior choice for residential and commercial projects. Its sleek, modern design enhances architectural appeal, while its low maintenance requirements and resistance to pests and rot provide long-term cost savings. It is also highly versatile, suitable for various roof slopes and project sizes, ensuring a reliable and visually appealing roofing solution.
1.2 Overview of Standing Seam Metal Roofing Systems
Standing seam metal roofing systems feature raised seams that connect panels, creating a strong, weather-resistant seal. These systems are typically installed over a solid substrate like plywood or OSB, ensuring stability. They are designed with hidden fasteners to enhance durability and aesthetics, making them a popular choice for both traditional and modern architectural designs. Their construction allows for flexibility in handling thermal expansion, ensuring long-term performance and structural integrity.
Tools and Materials Needed for Installation
- Tin snips or a nibbler for cutting metal panels.
- Clinching pliers for securing clips.
- Turn-up tool for bending edges.
- Fasteners, clips, and underlayment materials.
2.1 Essential Tools for Standing Seam Metal Roof Installation
The installation requires specific tools like tin snips or a nibbler for cutting panels, a turn-up tool for bending edges, and clinching pliers for securing clips. A rubber hammer is useful for fitting panels without causing damage. Additionally, a metal shear or jigsaw can be used for precise cuts, ensuring a smooth and efficient installation process.
2.2 Recommended Materials and Fasteners
High-quality materials like 26- to 22-gauge steel or zinc-coated panels are ideal for durability. Fasteners should include PH screws with waterproof washers for secure attachment. Panel clips, hidden fasteners, and compatible sealants are essential for weather-tight connections. Ensure all components are compatible to maintain structural integrity and prevent leaks.
Preparation of the Roof Deck
The roof deck must be solid, flat, and clean, typically made of OSB or plywood. Ensure the surface is even, free from debris, and meets manufacturer specifications for proper installation.
3.1 Substrate Requirements for Standing Seam Metal Roofing
Standing seam metal roofing requires a solid substrate, typically OSB or plywood, to ensure a stable and even surface. A moisture barrier is recommended to prevent condensation. The substrate must be securely fastened, free from gaps, and properly aligned to support the panels. Ensure the surface is clean and dry before installation for optimal performance and durability of the roofing system.
3.2 Ensuring a Solid and Flat Surface
A smooth, flat surface is essential for standing seam metal roofing. Address any unevenness or gaps in the substrate before installation. Check for structural integrity and ensure the surface is level. Remove old roofing materials and debris to create a clean base. Proper preparation ensures the panels lay flat, minimizing the risk of oil canning and ensuring a professional finish.
Installation Process for Standing Seam Panels
The installation involves placing panels, securing them with clips, and overlapping edges for a weather-tight seal. Begin at the starting point, align panels, and use fasteners for stability, ensuring a seamless fit across the roof surface. Proper alignment and secure fastening are crucial for long-term performance and durability. Follow manufacturer guidelines for precise execution.
4.1 Step-by-Step Panel Installation
Begin at the eave with the first panel, ensuring alignment with the roof edge. Secure it with fasteners, then install subsequent panels, overlapping the previous one by the recommended amount. Attach clips to the panel’s upstand, screwing them into the substrate. Use a hemming tool to bend the panel edge for a snug fit. Ensure each panel is clipped securely and aligned properly before moving to the next. After installation, inspect for proper fit and alignment.
4.2 Securing Panels with Clips and Fasteners
Attach clips to the panel’s upstand at specified intervals, typically 24 inches on center. Use approved fasteners to screw clips into the substrate, ensuring they are tight but not over-tightened. Engage the panel’s edge over the clip, then crimp to form a secure, weather-tight seal. Double-lock the seam by folding the adjacent panel over the clip and crimping firmly. This ensures structural integrity and prevents water infiltration.
Flashing and Weather-Tight Details
Flashing and weather-tight details are crucial for preventing water infiltration. Install flashing around roof edges, valleys, and penetrations using durable materials like rubber or PVC to ensure a watertight seal.
5.1 Proper Flashing Techniques for Standing Seam Roofs
Proper flashing involves sealing roof edges, valleys, and penetrations to prevent water leaks. Use pre-manufactured flashing components designed for standing seam systems, ensuring tight seams and secure fastening. Apply a continuous bead of waterproof sealant along the flashing edges and integrate it seamlessly with the roof panels for a durable, weather-tight finish.
5.2 Sealing Joints and Gaps
Sealing joints and gaps is critical to ensure a weather-tight standing seam roof. Apply high-quality, waterproof sealants to all seams, penetrations, and panel edges. Properly align panels to minimize gaps and use compatible sealants to avoid material degradation. Regularly inspect and reseal gaps to prevent water infiltration and maintain the roof’s structural integrity and long-term durability.
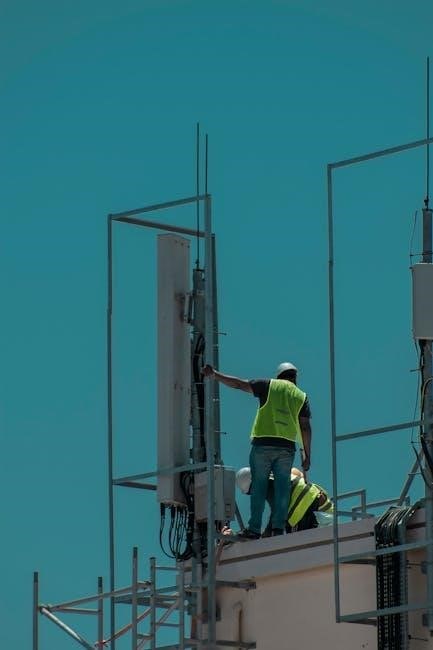
Safety Considerations During Installation
Always use extreme caution when handling metal panels. Ensure proper supervision by trained professionals and avoid walking on panels, as they may not support weight. Use safety harnesses and avoid installation during windy or stormy conditions to prevent accidents and ensure a secure working environment.
6.1 Potential Hazards and Precautions
Standing seam metal roof installation involves risks like falls, cuts from sharp edges, and injuries from power tools. Metal panels can be slippery, and improper handling may lead to accidents. Ensure proper use of safety harnesses, gloves, and eyewear. Avoid working on windy or stormy days, as panels may become loose or difficult to manage, increasing the risk of injury or damage. Always follow manufacturer guidelines and safety protocols to minimize hazards.

6.2 Best Practices for Safe Roof Access
Ensure safe roof access by using properly secured ladders and scaffolding. Wear safety harnesses and non-slip footwear to prevent falls. Plan installation steps to minimize ladder movements. Never use roofing panels as a walking surface, as they may not support weight. Ensure proper weather conditions, avoiding windy or stormy days, and train all workers on safety protocols before starting the installation process.

Expansion Joints and Thermal Movement
Expansion joints are critical in standing seam systems to accommodate thermal movement caused by metal contraction and expansion. Proper installation ensures panels can shift without damage, preventing warping or fastener loosening. Regular maintenance and correct joint placement are essential to maintain roof integrity and weather-tight performance over time.
7.1 Importance of Expansion Joints in Metal Roofing
Expansion joints are essential in standing seam metal roofing to accommodate thermal expansion and contraction. They prevent panel buckling and fastener loosening caused by temperature fluctuations. Properly installed expansion joints ensure the roof remains structurally sound and weather-tight, avoiding costly damage. Neglecting them can lead to warping and performance issues, making regular maintenance critical to uphold roof integrity and durability.
7.2 Managing Thermal Expansion in Standing Seam Roofs
Thermal expansion in standing seam roofs demands precise management to prevent panel damage. Clips and fasteners allow panels to expand and contract without stress. Proper clip spacing and alignment ensure even movement distribution. Additionally, expansion joints at roof transitions and ridges accommodate thermal shifts, maintaining system integrity. Regular inspections and adjustments are vital to uphold performance and longevity.
Finishing Touches and Final Inspection
Install ridge caps and trim for a polished look. Conduct a final inspection to ensure all panels are securely fastened, aligned, and weather-tight, meeting installation standards.
8.1 Installing Ridge Caps and Other Trim
Install ridge caps along the roof’s peak for a seamless finish. Secure caps tightly to ensure weather-tightness. Add drip edges, valley trim, and other decorative elements to protect edges and enhance aesthetics. Proper alignment and fastening of trim ensure longevity and prevent leaks, completing the roof’s polished appearance.
8.2 Conducting a Final Walk-Through and Inspection
After installation, perform a thorough walk-through to ensure all panels, trim, and fasteners are correctly secured. Check for proper alignment, weather-tight seals, and no loose or damaged components. Verify that all flashing, ridge caps, and drip edges are securely installed. Address any gaps or imperfections to ensure the roof’s integrity and appearance. Document and resolve any issues before final approval.
Common Mistakes to Avoid
Avoid over-tightening panels, as this can cause damage or oil canning. Ensure fasteners and clips are used correctly to prevent leaks or system failure. Properly account for thermal expansion to avoid buckling or seam separation.
9.1 Over-Tightening and Panel Damage
Over-tightening can cause permanent panel damage, such as denting, stretching, or fastener strip weakening. This may lead to oil canning, reducing the roof’s structural integrity. Always follow torque specifications to ensure secure attachment without compromising panel stability. Proper installation techniques prevent costly repairs and maintain the roof’s appearance and functionality over time.
9.2 Improper Use of Fasteners and Clips
Using incorrect fasteners or clips can compromise the roof’s weather-tightness and structural integrity. Improperly secured panels may leak or detach under wind stress. Always use manufacturer-recommended fasteners to ensure compatibility and durability. Misaligned or under-torqued clips can lead to panel movement and system failure, emphasizing the need for precise installation to maintain performance and longevity of the standing seam system.

Maintenance and Repair Tips
Regular inspections ensure longevity. Cleaning debris and checking fasteners are essential. Addressing oil canning and dents promptly prevents major issues.
10.1 Regular Maintenance for Standing Seam Roofs
Regular maintenance is crucial for extending the lifespan of standing seam metal roofs. Inspect for debris, loose fasteners, and dents. Clean gutters and downspouts to ensure proper water flow. Check for signs of wear, such as scratches or fading, and address them promptly to prevent rust or leaks. Regular cleaning prevents dirt buildup, which can damage the finish over time.
Inspect seams and clips for tightness, as loose connections can lead to water infiltration. Use appropriate tools to secure any loose fasteners without over-tightening. Schedule professional inspections annually, especially after harsh weather conditions. Routine maintenance ensures the roof remains weather-tight, durable, and visually appealing, protecting your investment for decades.
10.2 Addressing Common Issues and Repairs
Common issues with standing seam metal roofs include oil canning, dents, and loose fasteners. For minor dents, use a rubber hammer to gently reshape the panel. Tighten loose clips or fasteners without over-tightening, as this can damage the panels. For larger repairs, such as punctures or gaps, apply a metal patch sealant and secure it with screws. Regularly inspect and address these issues to maintain the roof’s integrity and appearance. If major damage occurs, consult a professional to ensure proper repair techniques are applied. Always use compatible materials and tools, like clinching pliers, to avoid further damage during repairs. Addressing issues promptly prevents leaks and extends the roof’s lifespan.
Standing seam metal roofing is a durable, low-maintenance option. For detailed installation and maintenance guides, refer to resources from Mueller and Best Buy Metals.
11.1 Summary of Key Installation Steps
Ensure substrate is solid and flat, adhering to OS or plywood requirements. Install panels with hidden fasteners, overlapping each to secure. Use clips to lock seams, crimping for a watertight seal. Apply striations to minimize oil canning. Follow manufacturer guidelines for expansion joints and weather-tight details. Conduct final inspections to ensure all components are properly secured and aligned.
11.2 Recommended Additional Reading and Guides
Consult installation manuals from manufacturers like Mueller and Best Buy Metals for detailed procedures. Refer to architectural guides for design specifics. Review safety protocols and local building codes to ensure compliance. Utilize resources like the Standing Seam Metal Roofing Installation Guide for troubleshooting and best practices in metal roofing applications.


